Saturday, July 31, 2010

From the Bucket List: Dresden Sunburst

When you're in the middle of the project and have nothing new to show, then it's time to talk about what you hope to do. Anyway, that's my theory.

So with no further ado, I present the Dresden Sunburst:


The Dresden Sunburst comes from the magazine Traditional Quiltworks.  I've taken several magazines over the years, and have liked all of them, but I must say Traditional Quiltworks was my very most favorite.  Sadly, I don't think it's being published any longer.  I made a major move, and didn't renew my subscription.  When I finally did consider renewing it, I couldn't locate the magazine.  (If I'm wrong about Traditional Quiltworks no longer being published, please let me know.)

I've kept the Dresden Sunburst pattern in a notebook all of these years--well past 10 years--with the hope that one day my skills would be good enough to tackle this lovely quilt.  One big hang-up that prevented me from trying this quilt earlier is all the white space that just begs for some fancy quilting.  Until recently, I found it very intimidating.  However, with my increasing confidence in my free motion quilting abilities, I expect that the day I start this quilt could actually be on the horizon.  (If I ever narrow down my current WIP list.)

Monday, July 26, 2010

If I Can Do Free Motion Quilting, You Can Too!

I've been "going big" (as Elizabeth would say) with free motion quilting the last week or so, experimenting in earnest.  It's time to talk about what I've learned.  I'm hoping I can encourage other free motion newbies to get beyond the intimidation.

1.  Have the right machine for the job.  While quilters do free motion quilting on all kinds of sewing machines from standard home models to longarms, I wasn't able to be successful on my standard sewing machine.  Last year, I attempted free motion quilting on my trusty little Kenmore.  While it is work to shove a big quilt through a standard harp, it can be done.  The issue that made it impossible for me to succeed on the Kenmore is the fact that the Kenmore just wouldn't go slow enough.  If I slowed down enough where I could I manage, the Kenmore stalled.

For me that meant an upgrade to a Juki TL98Q, which is considered a mid-arm.  While the Juki will do 1500 stitches per minute, it will also crawl.  Very good for a free motion quilting newbie.  I realize a lot of FMQ videos show the quilters zipping through the motions at high speed.  This is not appropriate for newbies.  To me, that's like a new driver starting out learning  to drive on the freeway.  Being able to go slow while you build control and confidence is a must in my opinion.  Just to be clear, I'm not dissing standard machines.  If your standard machine can do the job, that's great.  I'm just saying my standard machine wasn't up to the job.

2.  Feathers are the most forgiving FMQ design that you can do after stippling.


You probably don't believe me. If someone had said that to me before I tried feathers, I would have thought she was nuts. Surely a design so beautiful and intricate has to be hard. Nope! Not if you use the Hooked on Feathers technique. Besides the fact that the technique is simple and straightforward, there are other considerations that make these feathers a very forgiving design: 1. They do not have to be perfectly symmetrical to look good; 2. They do not have to be uniform in size to look good; 3. The shape of the feather can vary from rather flat to rather round all in the same design, and it still looks good.

Still don't believe me? Study these close up shots, and you'll see that my feathers are far from perfect.  The feathers are not always shaped exactly the same, are not perfectly symmetrical from one side to the next, and are not particularly uniform.


 Yet the overall effect is still pretty darn good.

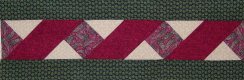
3.  Symmetrical designs, even thought they don't appear as intricate as feathers, require more control and concentration than feathers.  Before I actually started experimenting, I thought the little motifs in the following block would be easier than the feathers.  Nope, they are more difficult, because a certain amount of uniformity and symmetry is necessary.


That said, they are still more forgiving than you might expect.  They don't have to be perfect to look all right.  If you click on the picture to see it bigger, you'll be able to see what I'm saying.

Now here is an irony for you.  I started out using thread that matched the fabric as well as I could, thinking that if I had a "craptastic" spot, it would be less likely to show.  That is true.  However, I found that I could see so much better if there was a contrast between the fabric and thread, and that made me less likely to have a craptastic spot.  I'm still debating which is the best way to go.

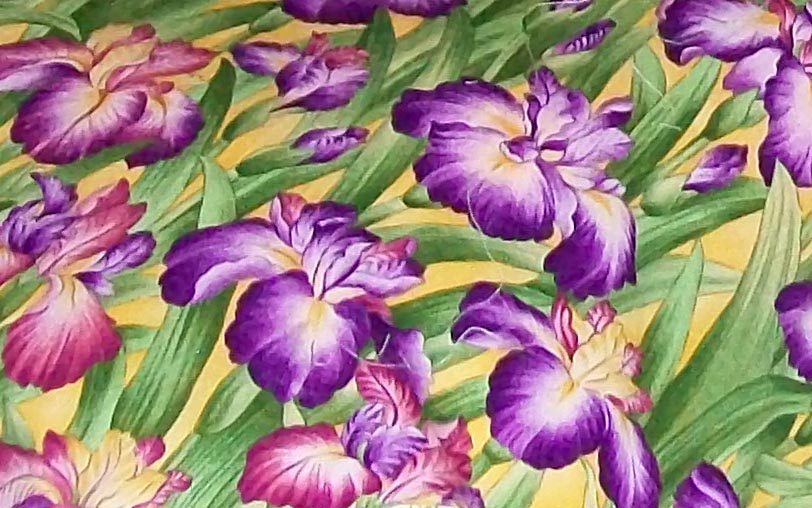
Another irony is that the focus fabric in this quilt--the pansy fabric--is one of the most difficult for me to quilt.  First off with its several bright colors, I can't see my thread in the pattern as I quilt.  Secondly, the curved lines of the flowers "interfere" with my visualization the curved lines of the motif.  Something weird happens in my brain, that I don't think would occur if the motif was composed of all straight lines.  However, since the thread doesn't show much on the pansy floral, the craptastic spots aren't at all noticeable, so I'll keep on plugging away.  It is getting easier.

I hope this post helps other FMQ newbies to feel a bit braver.  I think the crux of what I'm trying to say in this post, is that perfection is not a requirement.  You don't have to quilt like Wendy at Ivory Spring to achieve decent looking quilting.  And the thing of it is, if you don't get started, you never will quilt like Wendy.  Don't be afraid to take that first step.  Who knows maybe there is one among us who can eventually achieve that type perfection if only we give it a shot.

Okay, you more experienced Free Motion Quilters, any other observations that you can add?

Saturday, July 24, 2010

Quilter A.D.D.

As a person with a family member who has Attention Deficit Disorder, I do not write this post to make light of what can be a very frustrating condition.  That said, of late I've been a rather frustrated quilter because I can't seem to focus on only one or two projects.  It's not just that I feel like flitting between projects that I already have going (currently 10 WIPs), it's that I've got so many new ideas I want to try, and they also compete for my attention.  Ironically, the more successful I feel about whatever project I am working on, the more new ideas crop up.  Since I'm feeling extremely successful in regard to my free motion quilting endeavors this past week (the subject of a future post or two), my creativity is just flying.  However, there are only 24 hours in a day and most of those hours are filled up with other responsibilities, my shoulders can stand only so much free motion quilting, and there are those WIPs, which I'd dearly love to finish.

I've tried organizing by putting my WIP list on my blog where I can be reminded of them.  I've made a quilting bucket list that contains my priority projects for the future.  It currently sits at 12 projects and I'm loathe to add more because then it will simply devolve into a "maybe, someday, I hope to" do list--no prioritization.  However, I'm considering adding a "maybe, someday, hope to" list in hopes that if I record the ideas that are flitting through my brain, they'll quit bugging me.

Sheesh!  I can't believe I'm b*tching about having too many ideas.  Ridiculous!  Yet, I really do need to find a way to manage them. 

So tell me, how do you manage your Quilter A.D.D.?  Don't try to deny it.  I know most of you suffer too.

Okay, so that this post isn't a total whine, here is a picture of the latest NYB blocks.  It brings my total to 91.  At 98, I'll be at the halfway point.

Wednesday, July 21, 2010

Dresden Plate Wall-hanging


Some of you may remember that in May of this year, P. from The Way I Sew It, gave me the beautiful Dresden Plate that is now centered in the middle of this medallion wall-hanging top. I was pretty excited about receiving it and blogged about it here. On July the 4th, I finally came up with a plan to showcase the Dresden in a wall-hanging.  I am pleased to say that while it took me about 6 weeks to mull over how best to show off its beauty, the execution of the plan took less than a month.  That's a record for me!  (Hanging out with all you quilty bloggers has made me more organized.) True, it still needs to be quilted, but I am going to wait to do that until I've honed my free motion machine quilting skills just a bit more--or decide to hand-quilt it.

I used a textured black for the main body of the wallhanging. (If you click to make the pictures larger, the texture is more apparent.) The entire wall-hanging measures 24".  I debated about making it larger, but I wanted the borders to complement the Dresden Plate; not overwhelm it.  So I stopped at just two borders.  The inner pink-lavender border (Kona calls the color "Petunia") is only a 1/2 inch wide.  I'll admit that making the border so narrow gave me pause.  Instead of rotary cutting it as I ordinarily would for a wider border, I drew it out with pencil on the fabric and cut it out with scissors.


In order to sew accurately, I marked my 1/4 inch seam lines as well.  I was pleased with the result.


Finally, I added the ribbon border.  The instructions are from Quilter's Cache.  (She has lots of other border ideas on the site as well.)


The very last step was to hand-applique the Dresden to the wall-hanging.

I'll be linking up at one or more of the Friday Linky Parties shown in my sidebar.  There are always talented people sharing their latest creations at these Linky Parties, so be sure to check them out. You won't be disappointed!

Sunday, July 18, 2010

First Foray Into FMQ Feathers

Two nights ago with the help of my mom (Thanks Mom!), I pin-basted the Pansy Sampler Quilt. The pin-basting wasn't quite as tedious as usual, because as I pinned, I kept studying the various blocks imagining how I would apply my new found FMQ knowledge obtained from the books, Free Motion Quilting Made Easy, and Hooked on Feathers, which I blogged about here

So last night, I shoved the Pansy Sampler into the Juki and mentally psyched myself up.  Yep, I felt totally dangerous!

I guess the psyching up worked, because I jumped in deep.  It wasn't my intention to start out with feathers, although I was most anxious to try them.  However, there is only one block with a black background in the sampler, and the Juki was already loaded up with black thread, and I had planned feathers for that block.....  I took it as a sign.

Here is where I started.  The feathers don't look quite as pretty as those in the book, but for my very first attempt, I'm not dissatisfied.


(Sorry the pictures look washed out, but I have a feeling the quilting might be hard to see without the flash.)

Then I moved to a larger section in the background.  My original intent had been to fill the space with ever larger feathers as I moved from the center outward, but after I got to a certain size, making the feathers seemed a bit more difficult.  I decided larger feathers would be a different skill for a different day, and so I brought the motif back in at the top.  So far, so good.


The only problem is that I wanted the background totally filled, so I made some feather "sprouts" off to each side


It took me about 45 minutes to do these two little sections, but I could tell it was getting easier the more I did it, so I suspect it will go faster as I get more practice.  The other consideration time-wise, is that I didn't have to do any marking at all to create these intricate looking feathers.  That is definitely time saved.  Frankly, even with hand-quilting, I've never done any quilting this intricate because I didn't want to take the time to mark the quilt.  (I think I could use the same principles for making feathers in hand-quilting too.) 

I've always loved making tops, but got bogged down at the quilting phase, because I wasn't able to create extravagant designs on the machine, and hand-quilting takes a very long time.  I have a feeling that is all about to change.  I am ecstatic.

Thursday, July 15, 2010

Two Free Motion Quilting Book Reviews

When trying to learn a new skill, a totally sane person would at least buy a book or a CD on the subject, but not me. I have to muddle awhile on my own first. I need to get my hands into it, know what it feels like so that when I finally do buy that book or CD, the information will make more sense to me.

Having recently jumped into Free Motion Quilting while working on Matt's Quilt, I did indeed get familiar with a range of emotions and spastic moves associated with skill.
  • Ack!  Don't let your mind wander
  • Where the heck am I?
  • This is really cool!
  • I'm on a terrifying rollercoaster
  • Why did my hands do that?!
  • This is going to look like crap.
  • How fun!
  • What the heck am I doing?
In other words, my experience gravitated between horror and loving the possibilities.  So now, I finally decided to order some books on the subject of Free Motion Quilting.

The first book is Free Motion Quilting Made Easy by Eva Larkin.  I got a kick out of the "Made Easy" part of the title.  I had to see.

I'll admit that I was pleasantly surprised to find a lot of the information she provided did indeed make the process seem less daunting.  One of my problems when looking at a quilt is trying to decide how to even get started.  The quilt looks so big, the possibilities for design are wide open (if only my skills were good enough), and I just have no idea how to attack the problem.  This book addresses that issue.  While of course practice is still a must--there is no way around that--what this book does is provide a well-thought out strategy for making wonderful free motion quilting designs with little marking.  She advises breaking your quilting area down into sections no more than 4 1/2" square.  For a 12" block, this results in 9 sections within the block.  Within the 4 1/2" square sections, she shows how to use some very basic shapes--like ovals, triangles, diamonds--to make some very attractive and intricate looking designs.  When I was done perusing this book, I felt much calmer and as though I will be able to do free motion quilting successfully.


The second book is Hooked on Feathers by Sally Terry.  There were two reasons I got this book.  First, I love the look of feathers in quilting, so if there was a chance in the universe I could learn to do feathers, then I wanted to take it.  The second reason is that several quilters have recommended this book as an incredibly easy way to achieve beautiful looking feathered designs.  I'll admit that again I was skeptical.  Feathers that beautiful just couldn't be that easy.  And yet, the technique this talented quilter has developed does provide a way to make beautiful feathered motifs with little marking and much less work than traditional feathers.  When I read about her technique, I was confident I could master it.

Armed with the information, techniques, and tips from these two books, I'm going to start free motion quilting the Pansy Sampler Quilt.  It's not only going to be a sampler by block design, but also in quilting.  The 16 blocks in this quilt ought to provide me with ample opportunity to try out these various quilting techniques.  Unlike Matt's Quilt, this quilt is for me, and so any imperfections will be mine and mine alone.  I am poised with anticipation!

While today's blog doesn't show off any creative achievement, I am going to link up over at Amy's blog for Sew and Tell Friday.  I hope that these book reviews will be inspiring to other free motion quilting newbies like myself.  And since I will be sharing my free motion quilting adventures with my fellow bloggers on Sew and Tell Friday in the future, I wanted everyone to know where the adventure began. 

I'd better to get to pin basting the Pansy Sampler Quilt!

Saturday, July 10, 2010

I am a Fabricaholic, Enabling Others

I am a fabricaholic and I'm not afraid to admit it! No, I don't want treatment. I'm perfectly happy reveling in my fondness for fabric. Even better, my mom and fellow quilter, is an enabler. (Although many times the roles are reversed and she's the fabricaholic and I'm the enabler.  We take turns.)

Usually I sate my fabric appetite by buying 1/4 or 1/2 yards of a wide variety of fabrics. Being primarily a scrappy quilter, this system works most of the time. However, last night I came upon this beauty at Joann.com.


I tried to put it out of my mind, but I couldn't. I'd go back and look, thinking to myself it couldn't possibly be as yummy as I thought. Instead, with each visit I became more convinced I had to have it. It didn't help that my mom sat right beside me agreeing that the fabric in question was indeed delicious. It didn't help that I had an online coupon for 50% off one full priced item that was due to expire today. What little willpower I had melted away.

So I just bought 4 yards of a fabric that I have absolutely no idea what I'm going to do with!

As a good fabricaholic and enabler, here is the list of Joann coupons that are good until the end of today (7/10/10): (You can use only one of them per order.)

50% off any full-priced item: EFD191
10% off your total purchase: EGD191
$5 off a purchase of $35 or more: ERD191

Thursday, July 8, 2010

Couldn't Talk Her Out of It

My mom made this beautiful Garden Twist quilt, which she simply calls "Spring".


My mom is a bit of a perfectionist when it comes to quilting--and it shows in her gorgeous quilts.  Like so many quilts, this one did not behave itself one bit during the process.  And like all real quilters, my mom mulled, cursed, and threatened it with scissors until she got it right and produced this lovely bed quilt.

First of all, the quilt was a result of a fabric accident.  My mom was shopping online for fabric for a new shower curtain.  She was trying to get a fabric to match the new tan colored tile in the bathroom.  In the photograph at the online fabric store, the iris fabric looked perfect.  It looked like it had a tan background.  However, when it arrived, she discovered the background was actually gold and not tan.  So out with the shower curtain and in with a new quilt.


This fabric is a little wilder and brighter than my mom's usual fabric choices for quilts.  Periodically she'd wonder aloud if the quilt was just going to be too bright for her.  Aha!  I saw an opportunity to try to snag the quilt for myself.  Each time she'd say that, I'd tell her if it was too bright for her, she could give it to me.  She'd giggle and say, "We'll see."

After she finished the main body of the quilt, she added a border of the light green background fabric that she'd used as the outer triangles for the Garden Twist section.  Looked great, but again there were problems.  Although it had worked well in the triangle sections, the light green background fabric stretched when it was used in the long border strips.  It made fitting the sweet little flower blocks a real challenge.  Yes, there was more mulling, cursing, and threatening.  She wondered if she was going to hate the quilt when it was finally finished.  I told her if she hated it, she could give it to me.  She giggled and said, "We'll see."


The stretched light green border also caused problems when it came to quilting.  It wanted to bunch up in places.  I suggested she stipple it, because I thought it would be more forgiving than any straight line quilting she might attempt.  So although not in her plans for this quilt, my mom tackled stippling for the first time.  More mulling, cursing and threatening.  I again offered to take it off her hands if she hated it.  She giggled and said, "We'll see."  This was becoming a running joke. Ultimately, the stippling was more forgiving and worked well for the stretched border.  My hopes were fading fast that I'd get my hands on this beauty.

My last hope was the prairie points.  She's never made them before.  And while there was a lot of mulling, cursing was minimal and the threats were not existent.  She knew she was on the downhill stretch even if the prairie points were a new adventure.  They didn't give her all that much trouble. 


I gave it my best shot, but I couldn't talk her out of this quilt. Darn!

I'll be linking up over at Amylouwho's for Sew and Tell Friday in order to fully show off this Garden Twist beauty. Be sure to check out everybody else's lovely work.

Wednesday, July 7, 2010

Cat-napper Quilt: A Ridiculous Project

No, I'm not doing the rational thing and making a quilt to use while I cat-nap. I'm making a quilt for the cat to use while he cat-naps. I told you it was a ridiculous project. You may sanely ask, "Why in the world does a cat need a quilt? A cat will use any darn quilt he wants." You're right; Charley does. That is the problem. You see this black cat on my white quilt? Do I really need to explain further?


Okay, I suppose I do. It can't possibly make sense yet (if it ever will). See what black cat fur looks like on a white quilt? Since Charley naps on my bed daily, it doesn't take long before his favorite spot looks gray. I need to buy stock in the lint roller company!

Naturally you're thinking, "Still, why does the darn cat need his own quilt? Just put a towel down for the little bugger." Tried that. Nope. The varmint can tell that the towel is not a quilt. Instead of laying on the towel, Charley pawed it all up in heap, and laid beside it on the white quilt. Ahem!

Then a free pattern for the quilt shown below came in the mail from a quilting magazine trying to entice me to subscribe to their magazine. (It worked by the way.  I now subscribe to McCall's Quilting.)
The pattern intrigued me. I immediately began wondering what would it look like if the cross-hatches were all white and the squares all shade of green, purple, and blue? Or maybe jewel-toned squares with black cross-hatches? Then it hit me. I could kill two birds with one stone..., or er, one quilt. I could satisfy part of my curiosity by making the jewel tones with the black cross-hatches version for Charley.  Maybe if I lay down another quilt over the white quilt, he'd find that acceptable.  After all, he's never met a quilt he didn't like.  Hmmmm. Crazy, but it might be cool.

I've begun cutting the squares needed for the quilt as I cut fabric for some other projects.  I still have a ways to go.  I'll need 64 squares to make the quilt 40" X 40".  The finished block is supposed to be 5" square.

Yes, I know.  It won't really solve the excess fur problem.  The only difference is that if this works, I'll be able to fold up the quilt and deal with the fur issue at my convenience, rather than having lint rolling part of my daily routine.  Now, I'm just hoping Charley doesn't prove to have a preference for white.

Monday, July 5, 2010

A Shout Out for Kristen at So Happy, and Quilter's Cache

Kristen at So Happy hosted the Dresden Plate Party which inspired the Dresden Plate that P. gave to me.  Now Kristen is hosting a giveaway.  She's giving away lots of cool stuff, so don't hesitate to check it out.  Maybe you'll be her next winner!


Secondly, several quilters commented on how much they liked the ribbon border in the Dresden Plate wall-hanging mock up I presented in A Quilty 4th of July Lift Off.  It had been my intention to mention the source of the ribbon border in that blog, but I was so excited to show off my plans for P.'s Dresden Plate, that I forgot it.  So I'm making amends now.  The source is Quilter's Cache, Borders.  The directions on how to make the ribbon border are there along with directions for over a dozen other borders. It's a wonderful resource, and I plan on using it again.

Sunday, July 4, 2010

A Quilty 4th of July Lift-Off

Some of you may remember back in May when P. from The Way I Sew It gifted me this lovely Dresden Plate. I blogged about it here.  At the time, P. was part of the  Dresden Plate Party hosted by Kristen at So Happy.  As P. blogged about the process and what she planned to do with the Dresden Plates she'd made, I put a not so subtle beg in the comment section.  It worked!  This lovely Dresden Plate soon arrived in my mailbox.  I was one lucky quilter!

When I received the Dresden Plate, I knew immediately what I wanted to do with it.  It would become the center medallion for a small wall-hanging.  And although I've not worked on the wall-hanging physically since I received the Dresden Plate, I've been doing mental gymnastics trying to decide just how to show off its beauty the best.

I finally decided that a simple layout would be the surest way to do this lovely Dresden Plate justice, and so with the wonders of EQ (Electric Quilt), I auditioned several ideas.  This is the layout that I like the best.  (With the exception of the black background, ignore the colors.  I couldn't satisfactorily copy the colors in P.'s Dresden Plate, and the other colors are still up for debate.)


The Dresden Plate itself measures 13" in diameter.  The finished wall-hanging will measure 24".  The ribbon blocks on the outer border will be only 2" square.  Might be a bit of a challenge, but they are very simple to construct.

I'm excited that I can finally turn my attention to this project.  To that end, I did cut out the 16 1/2" black square to which the Dresden Plate will be appliqued.  Getting the Dresden Plate wall-hanging project off the ground was a fun way to spend 4th of July morning. 

I wish everyone a wonderful Independence Day!

Friday, July 2, 2010

Poll Results--How Do You Stack Up?

The WIP/UFO polls have closed. "How Many WIPs Do You Have?" brought in 71 votes total, and "How Old is Your Oldest UFO?" brought in 60 votes total. So with no further adieu, here are the results:

How Many WIPs Do You Have?:
  • Just one:  1 %
  • 1-5:  36%
  • 5-10:  22%
  • 10-15:  18%
  • More than I'll ever admit:  21%

How Old is Your Oldest UFO?:
  • Have no UFOs:  5%
  • 2 years:  11%
  • 2-5 years: 13%
  • 5-10 years:  28%
  • 10-15 years:  28%
  • Older than I'll ever admit:  13%

Okay, I have to admire the person who is focused enough to have only one project going at a time.  At 1%, there was only one of you--and I trust that you know who you are.  That takes concentration, determination, and self-discipline.  I'm not focused enough to concentrate on one project from beginning to end, and my determination wanes if I become daunted by the next step.  Self-discipline?  Heck, I regard the fact that I've started only one new project this year (besides the baby quilt that needed to be completed by July and was done by April) as self-discipline.  For me, that takes a considerable amount of effort.  With 10 WIPs, I'm in good company with 22% of you.  The largest group at 36% has only 1-5 WIPs going at one time.

Then there is the admirable group at 5% who has no UFOs.  Of course, this could be a matter of definition.  Carla, at Sew It Up Baby, said she doesn't like to refer to any of her projects as UFOs, because then it means the project is neglected.  I think she has a point.  I haven't neglected any of my projects, although I've been stuck in one place on some of them for a really long time.  Continuing in that vein then, I'm in good company with one of the larger groups--those who have WIPs/UFOs of 10-15 years old.  28% of us fall into this category.  The other large group, also at 28%, have WIPs/UFOs of 5-10 years old.

My Black and White and Red All Over quilt is approximately 3-4 years old.  It came about as block swap, and included signature blocks, which appear in the top and bottom border of the quilt.  After I free motion quilt the Pansy Quilt, this one will be next.  It's nice to have a plan for completing this WIP.  I wouldn't mind whittling down the WIP list just a bit.